
Quick answer:The creation of a 360 product video from a 3D model, first of all import a well-modeled and UV unwrapped 3D object in a 3D software (Blender, Cinema 4D or any real-time engine) create a turntable setup by rotating either the object or the camera for 360 degrees around the object, light it on a neutral or branded background, and finally render the animation as an image sequence and convert it into an MP4 or WebM video format. A usual looping cycle is usually 4 to 8 seconds long at 24-30 fps which is equal to 96 to 240 frames.
Two things make the biggest difference: a well-built 3D model and realistic materials with good lighting. (PBR) materials lit by an HDRI environment. Once you have a clean spin, you can repurpose it into ad cuts, demo overlays and shoppable reels.
By the Pixlnexs Animation Studio team, we produce AI video and 3D content and run the marketplace at store.pixlnexs.com, so this reflects real production experience.
A 360 product video is the workhorse asset of 3D ecommerce. It shows shoppers the whole product, removes guesswork and drops into product pages, paid social and email without needing a photo studio. If you already own a 3D model (bought, commissioned or scanned) you are most of the way there. This guide walks the full pipeline from raw model to a polished, loopable spin, with the trade-offs we actually weigh on production jobs.
What you need before you start
The output is only as good as the model going in. Before you open any animation software, confirm four things, because fixing them after a render is expensive.
1. A clean, watertight model
Check that the mesh has sensible topology, no flipped normals and no stray or overlapping geometry. Flipped normals show up as dark or “see through” patches the moment you light the scene. If you bought the model, open it and rotate it in the viewport before committing to a render. Five minutes here saves a re-render later.
2. Correct real-world scale and a sane pivot
Set the model to real-world units (a 30cm bottle should be 30cm). More importantly, place the pivot/origin at the model’s base center. If the pivot is off-axis, your “spin” will wobble like an off-balance washing machine instead of rotating cleanly in place.
3. PBR materials and textures
In modern product renderings the rendering method used is physically based rendering: base color, metallic, roughness and normal maps. It is the physically based rendering method that makes the brushed metal looks like metal and matte plastic looks like plastic regardless of the lighting. The glTF format by Khronos group has emerged as the standard interchange format for physically based renderings and so any model shipped as glTF or GLB would have the material correctly.
4. A lighting environment (HDRI)
A single HDRI (high dynamic range image) environment map gives you realistic reflections and soft, even light in one step. Studio HDRIs with a softbox setup are the fastest route to a clean product look.
Step by step: building the turntable
Step 1 Import and orient
Import the model, snap it to the world origin and orient it so its “hero” face points at the start camera. Decide your front facing angle now. This is the frame that will appear as the video thumbnail and the loop seam, so it is worth getting right before anything else.
Step 2 Choose rotate-model vs. rotate camera
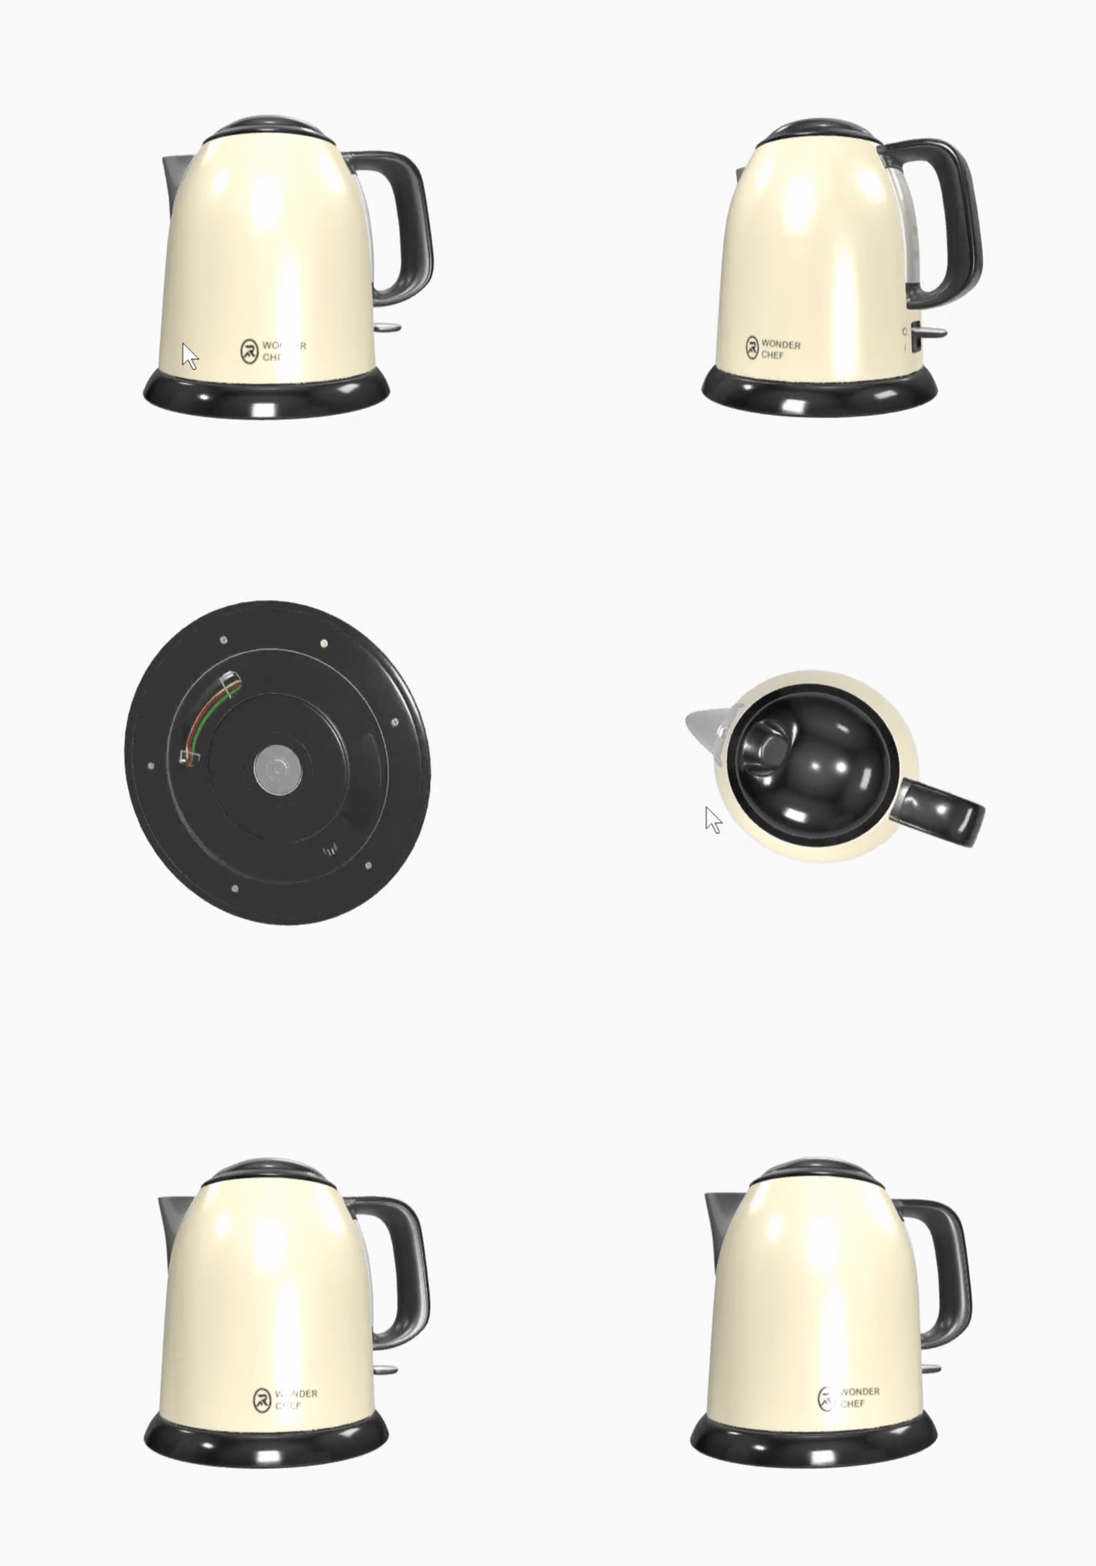
You can either spin the model on its vertical axis or orbit the camera around a still model. Spinning the model is simplest and keeps your lighting reflections fixed relative to the camera. Orbiting the camera keeps the product physically still, which helps if it sits on a surface with shadows you want anchored but it takes a little more setup. For most ecommerce spins, rotate the model.
Step 3 Animate a full, even rotation
Set a keyframe at frame 1 with rotation 0 degrees and a keyframe at the last frame with rotation 360 degrees, then set the interpolation to linear. Linear interpolation is the part people skip: the default ease in and ease out makes the spin slow at the start and end, which breaks a seamless loop. For a perfect loop make the first and last frame identical by ending one frame before the full 360 (for example, keyframe 360° at frame N+1 but render frames 1 to N).
Step 4 Light and set the backdrop
Drop in your HDRI for reflections, then add a key light and a soft fill. A seamless “infinite floor” backdrop (a plane that curves up behind the product) reads as a premium studio shot. Keep the background a brand color or neutral grey/white so the product stays the focus.
Step 5 Frame the camera
Use a slightly long lens (an 85-135mm equivalent) to avoid wide-angle distortion that bloats the nearest part of the product. Leave breathing room around the silhouette so the product never clips the frame edge as it turns. The thing that catches people out is the widest profile: a handle or spout that sits flush at the front angle can swing past the frame edge halfway through the rotation, so frame for the widest moment, not the start frame.
Step 6 Render an image sequence, then encode
Render to a PNG or EXR image sequence rather than straight to video. A sequence lets you resume after a crash and re-encode without re-rendering. Then encode to MP4 (H.264) for broad compatibility and WebM (VP9 or AV1) for smaller web files. Keep an alpha-channel version (ProRes 4444 or PNG sequence) if you will later composite the product over other backgrounds.
Settings that matter: frames, length and resolution
There is no single “correct” spec. It depends on where the video plays. Here is how we size jobs in practice.
| Use case | Length | Frame rate | Resolution / aspect | Format |
|---|---|---|---|---|
| Product page loop | 5-8s looping | 30fps | 1080×1080 (1:1) | WebM + MP4 fallback |
| Paid social feed | 6-10s | 30fps | 1080×1350 (4:5) | MP4 (H.264) |
| Reels / Shorts / TikTok | 5-15s | 30fps | 1080×1920 (9:16) | MP4 (H.264) |
| Hero / homepage banner | 4-6s looping | 30-60fps | 1920×1080 (16:9) | WebM (VP9/AV1) |
On frame count: a 6-second loop at 30fps is 180 frames. Doubling to 60fps doubles render time and file size for a smoothness gain most viewers will not notice on a small spinning product, so we usually reserve 60fps for large hero banners. For broad device support, lean on widely adopted formats; the web.dev guide to video and source tags covers serving WebM with an MP4 fallback so every browser gets a playable file.
Offline render vs. real-time engine
You have two broad routes to the actual pixels and the right one depends on volume and look.
| Factor | Offline renderer (Cycles, Redshift, Octane) | Real-time engine (Unreal, Three.js, web viewer) |
|---|---|---|
| Visual ceiling | Highest: accurate reflections, refraction, soft shadows | Very good and improving but some shortcuts |
| Speed per frame | Seconds to minutes | Real-time to near-instant |
| Best for | Hero products, glass/metal, marketing campaigns | Large catalogs, interactive 360 spins, fast turnaround |
| Interactivity | Pre-rendered video only | Can also ship a drag-to-rotate web viewer |
For a small number of flagship SKUs, an offline render wins on polish. For a catalog of dozens or hundreds of products, a real-time pipeline, where one template lights and spins every model the same way, is the only sane option. Here is what actually decides it on a job: if you are rendering glass or chrome and the client will pixel-peep the reflections, go offline; if you are turning 200 marketplace models around on a deadline and they need to look like siblings, the template wins every time. That templated approach is exactly what we run at store.pixlnexs.com to turn marketplace 3D models into consistent spin videos at scale.
Where AI speeds the pipeline up
AI saves time by handling repetitive tasks, but you still need a good 3D model and proper lighting to get the best result. We use it to upscale lower-resolution renders, to generate background plates and lifestyle environments the product can spin in front of, to denoise renders so you can use fewer samples (and shorter render times) and to auto-cut a long master spin into platform-specific edits with captions. The model and lighting still have to be right. AI cannot invent the back of a product the 3D model never described. For a fuller breakdown of turning models into selling assets, see our hub guide on AI product videos for ecommerce.
Common mistakes that ruin a spin
- Eased rotation. The loop visibly stutters at the seam. Always use linear interpolation across the full turn.
- Off-center pivot. The product wobbles instead of spinning in place.
- Clipping the frame. The product fits at the start angle but its wide profile clips mid-rotation.
- Flat lighting. No HDRI means no reflections and the product looks like a flat CG cutout.
- Encoding straight to video. A crash at frame 170 of 180 forces a full re-render. Always render an image sequence first.
- Wrong loop length. Rendering frame 1 and the duplicate final 360° frame produces a one-frame hitch every loop.
From one spin to a full asset set
A single clean 360 master is the source for a lot more. Crop it to 1:1, 4:5 and 9:16; add a caption hook and a price tag for paid social; overlay feature callouts to make a demo. We cover those downstream cuts in product demo videos with AI and in AI UGC-style ad videos at scale. Once you have the 360 video, you can use it on your website, social media, ads, and online stores without creating it again.
Frequently asked questions
How long should a 360 product video be?
For a looping product-page or hero spin, 4-8 seconds is the sweet spot, long enough to read the whole product, short enough to loop without feeling slow. Social cuts can run 6-15 seconds because they often pair the spin with captions or a hook. The spin itself should be one full, even rotation regardless of length.
What file format should I export?
Export MP4 (H.264) as your universal, always-plays file and add a WebM (VP9 or AV1) version for the web because it is meaningfully smaller at the same quality. Keep a high-quality master (a PNG/EXR image sequence or ProRes) so you can re-encode for any platform later without quality loss.
Can I make a 360 video without 3D software?
Yes, in two ways. You can shoot a real product on a physical turntable and stitch the photos or you can use a web-based or marketplace 3D pipeline that takes an existing model and outputs the spin for you. The 3D-model route gives perfectly consistent lighting and lets you re-render any angle or background later, which a photo turntable cannot.
How many frames does a smooth spin need?
At 30fps, a 6-second loop is 180 frames and looks smooth for a typical product. Lower than about 24fps can look choppy on detailed products; going to 60fps doubles render time and file size for a gain most viewers will not notice on a small spinning object, so reserve it for large hero banners.
Do I need a high-end GPU to render this?
Not necessarily. Real-time engines and web viewers can produce good spins on modest hardware and a single short loop is a manageable render even on a mid-range machine. Heavy offline renders with glass, metal and high sample counts benefit from a strong GPU or a cloud render farm but you only need that for top-tier hero assets, not your whole catalog.
How do I make the loop seamless?
Use linear (constant-speed) rotation across the whole turn and make sure the last rendered frame is the one just before the model returns to its exact starting angle. If you render both the 0° start frame and a duplicate 360° end frame, you get a visible one-frame pause every loop. Drop the duplicate and the loop is invisible.
Can the same 3D model produce other video types?
Yes and that is the main advantage of working from a model. One asset can become a 360 spin, an exploded-view demo, a lifestyle scene and platform-specific ad cuts, all with consistent lighting and branding. Build the model and lighting template once, then drive every output from it.








Leave a Reply