
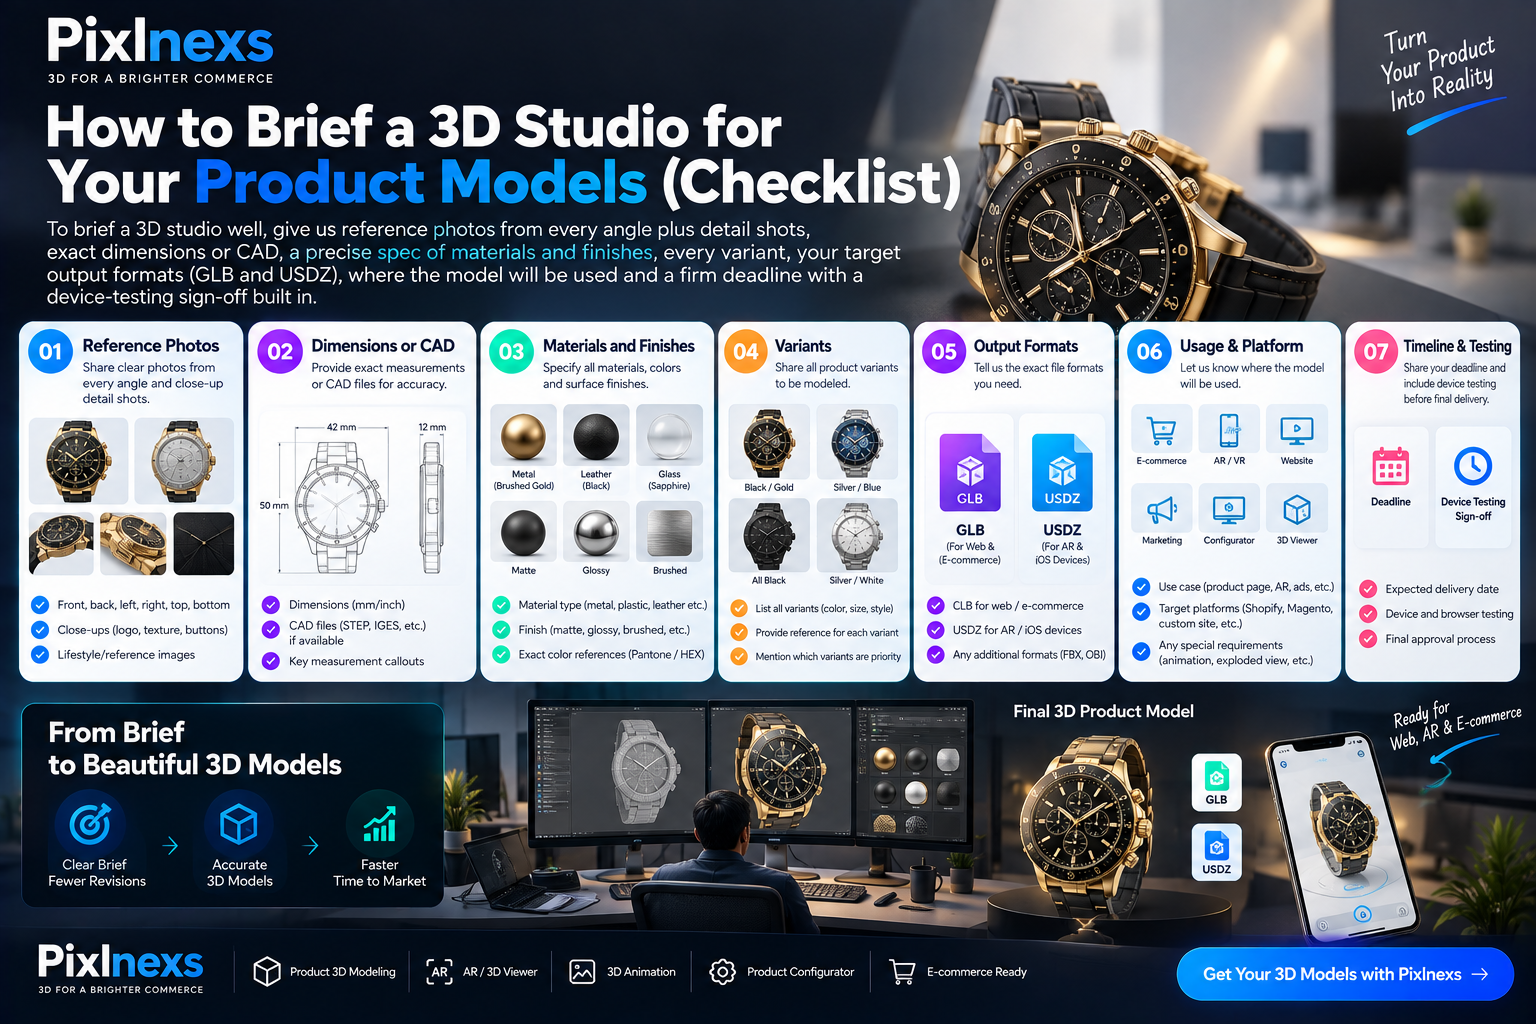
Quick Answer: To brief a 3D studio well, give us reference photos from every angle plus detail shots, exact dimensions or CAD, a precise spec of materials and finishes, every variant, your target output formats (GLB and USDZ), where the model will be used and a firm deadline with a device-testing sign-off built in. Do that and we hand back accurate 3D product models on the first pass instead of the third.
By Manoj, Pixlnexs Studio. Pixlnexs builds product models, AR and configurators for ecommerce brands and this checklist is exactly what we wish landed in our inbox at the start of every project.
Key takeaways
- Reference + dimensions are non-negotiable. Photos show us what a product looks like; CAD or measured dimensions tell us how big it actually is. We need both.
- Materials and finishes drive realism. “Matte black” and “soft-touch charcoal with a 30% gloss coat” are different jobs. Spell out finishes and Pantone or brand colours.
- State the intended use up front. A PDP viewer, an AR try-on and a configurator each have different polygon, format and file-weight budgets.
- A tight brief is the cheapest revision control there is. Most overruns come from gaps in the brief, not from the modelling itself.
- Agree scope and formats in writing. List the deliverables, the file formats and a device-testing sign-off step before work starts.
Why a good brief is the difference between one pass and three
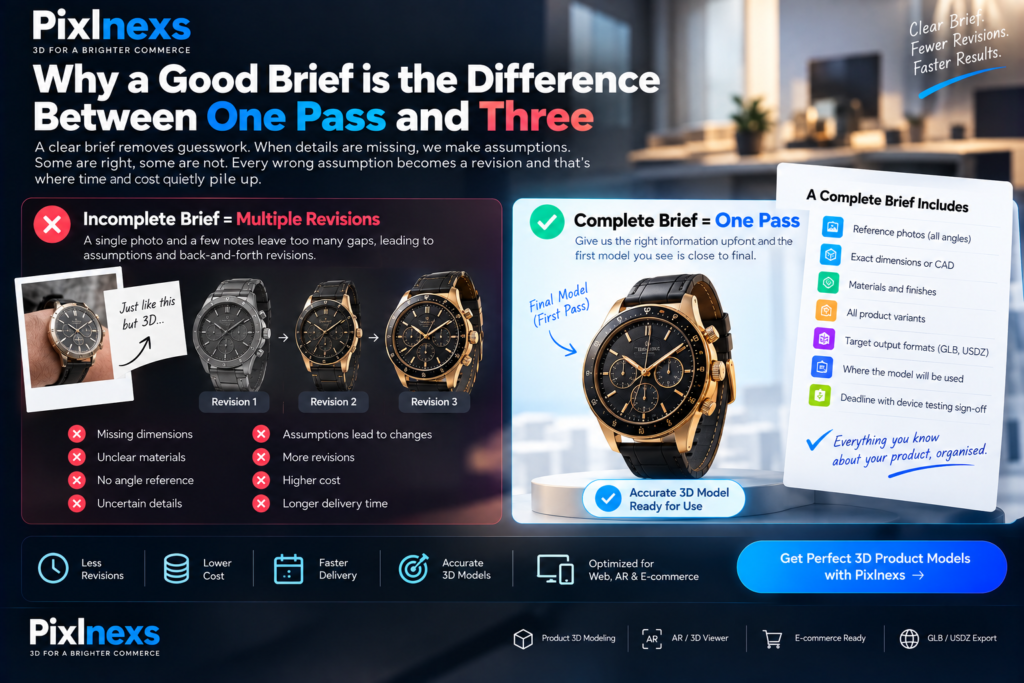
We have built thousands of product models and a pattern shows up every time. The projects that finish on schedule and on budget almost always started with a clear brief. The ones that drift into round after round of revisions usually started with a single photo and a hopeful “you’ll figure out the rest.”
Here is the honest mechanics of it. When you brief a 3D studio with gaps, we fill those gaps with assumptions. Some land; some do not. Every wrong assumption becomes a revision and revisions are where time and cost quietly pile up. A complete brief removes the guesswork, so the first model you see is close to final rather than a starting point for negotiation.
None of this requires you to speak fluent 3D. It just requires you to hand over what you already know about your own product, in an organised way. The checklist below is exactly what we wish landed in our inbox at the start of every project.
The checklist: what to put in a brief to a 3D studio
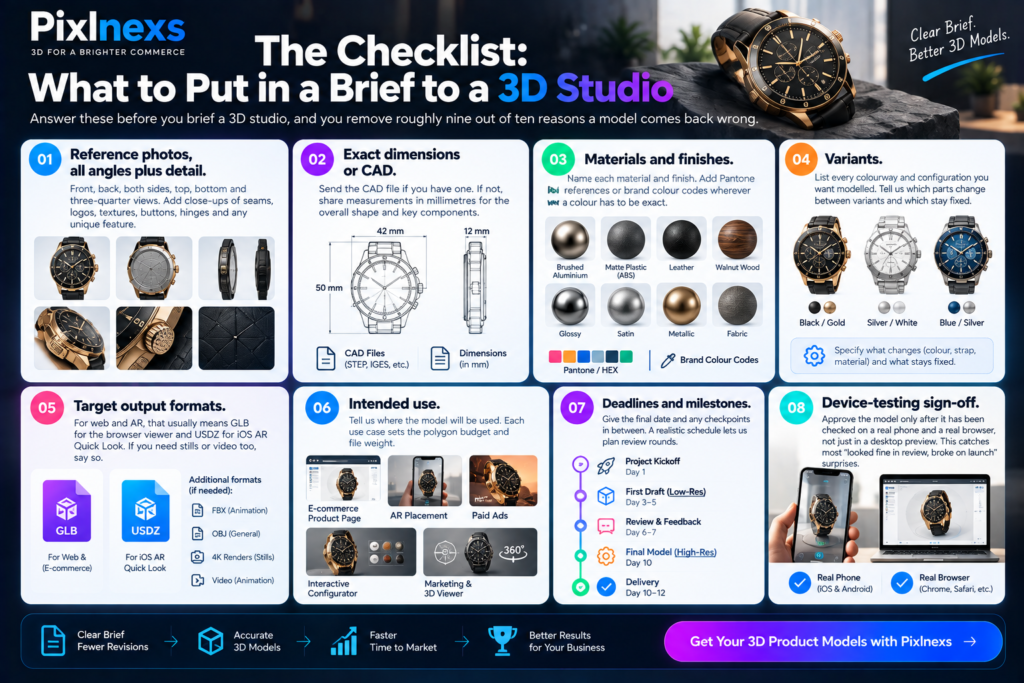
Work through these in order. If you can answer all of them before you brief a 3D studio, you have removed roughly nine out of ten reasons a model comes back wrong.
- Reference photos, all angles plus detail. Front, back, both sides, top, bottom and three-quarter views. Then close-ups of seams, logos, textures, buttons, hinges and any feature that defines the product. Even phone photos help, as long as they are sharp and evenly lit.
- Exact dimensions or CAD. Send the CAD file if you have one. If not, give us measured dimensions in millimetres for the overall shape and key components. Scale errors are invisible in a render but obvious the moment a model is placed in AR.
- Materials and finishes. Name each material (brushed aluminium, walnut, ABS plastic, woven fabric) and its finish (matte, satin, gloss, metallic). Add Pantone references or brand colour codes wherever a colour has to be exact.
- Variants. List every colourway and configuration you want modelled. Tell us which parts change between variants and which stay fixed, so we build a base mesh that swaps cleanly instead of rebuilding from scratch each time.
- Target output formats. For web and AR that usually means GLB for the browser viewer and USDZ for iOS AR Quick Look. If you need stills or video too, say so, because high-poly render assets and real-time web assets are built differently.
- Intended use. Tell us where the model lives: a product-page viewer, an AR placement, paid ads or an interactive configurator. Each one sets the polygon budget and file weight.
- Deadlines and milestones. Give us the final date and any checkpoints in between. A realistic schedule lets us plan review rounds rather than scramble at the end.
- Device-testing sign-off. Agree that the model is approved only after it has been checked on a real phone and a real browser, not just in a desktop preview. This single step catches most “looked fine in review, broke on launch” surprises.
How to brief a 3D studio on materials without jargon
You do not need to know what a roughness map is. You do need to describe what your product feels like in plain words. Is the surface glossy enough to throw a sharp reflection or soft and diffuse? Is the metal polished like a mirror or brushed in one direction? Does the fabric have a visible weave? Hand us a physical sample, a fabric swatch or a link to the real product page and we translate that into the right material setup. The clearer the description, the closer the first render lands. If you want the full list of supporting files that help here, see our guide to what assets you need to provide.
How intended use changes everything we build
The same product becomes a different model depending on where it ends up. A hero render for a campaign can carry millions of polygons and bake for hours. A model that loads inside a phone browser has to be light enough to appear in a second or two without draining the battery. If you do not tell us the destination, we either over-build (slow pages, blown budget) or under-build (a model that looks great in ads but rough in the viewer).
This is also where the commercial case lives. A well-optimised interactive model on the product page is not a vanity asset; there is a clear link between how interactive 3D improves sales and the time shoppers spend engaging with a product they can spin and inspect. Tell us the goal and we build to it.
Formats, scope and getting it in writing
Before the first polygon is placed, both sides should agree on the same short list: the deliverables, the file formats, the number of variants, the number of review rounds and what “done” means. Putting this in writing is not about being formal; it is about making sure nobody discovers a mismatch at delivery. A two-line scope note in an email is enough.
The comparison below shows what a thin brief costs versus what a complete one buys you. It is drawn from how real projects actually play out.
| Brief Element | Thin Brief | Complete Brief |
|---|---|---|
| Reference | One or two photos | All angles plus detail shots |
| Dimensions | “Roughly this size” | CAD or measured millimetres |
| Materials | “Black, shiny” | Named finishes plus Pantone codes |
| Formats | Decided later | GLB plus USDZ agreed up front |
| Typical revisions | 3 to 5 rounds | 0 to 1 round |
| Effect on cost | Creeps upward | Predictable and quoted |
If budget is the open question on your side, our breakdown of 3D rendering cost explains what drives the number and the thin-brief column above is usually where the surprises hide.
What happens after you brief a 3D studio
Once we have a complete brief, the work runs top down: we block out the geometry, apply materials, set up variants, then export and test in your target formats. You can see the whole sequence in our walkthrough of the full process to create an interactive 3D product model. If your starting point is a real physical product rather than CAD, our note on how photogrammetry works covers how we turn a set of photos into clean geometry. For broader context on tooling and where these models get deployed, our guides to the best 3D visualization platforms and interactive 3D product visualization are good companions.
Frequently asked questions
What is the single most important thing to include in the brief?
Accurate dimensions, ideally as CAD. Photos can be interpreted but scale cannot be guessed. A model built to the wrong size looks fine on screen and falls apart the moment a shopper places it in AR next to their sofa.
Do I need CAD files to brief a 3D studio?
No. CAD makes our job faster and more precise but if you do not have it, sharp reference photos from every angle plus measured dimensions are enough to get an accurate model. Photogrammetry is also an option when you have the physical product on hand.
Which file formats should I ask for?
For ecommerce, GLB for the web viewer and USDZ for iOS AR cover most needs. If you also want marketing stills or video, ask for those as separate render deliverables, since they are built to a different specification than real-time web assets.
How do variants affect the quote?
Variants that share a base shape and only change colour or material are inexpensive to add. Variants that change geometry, such as a different lid or an extra component, take more work. Listing every variant up front lets us build a base model that swaps cleanly and quote the whole set accurately.
How long does it take to get a model back after briefing a 3D studio?
Timeline depends on product complexity and how many variants are in scope but a complete brief with clean reference material typically means a first-pass model within days rather than weeks, since there’s no back-and-forth to resolve missing information before work can start.
What if I don’t have professional photography of my product yet?
Sharp phone photos are usually enough, as long as they’re well-lit and cover every angle plus close-up detail shots. What matters more than camera quality is coverage: a full set of angles from a phone beats a few beautiful hero shots that only show the front.
Written by the Pixlnexs 3D team, who build product models, AR and configurators for ecommerce brands.
Ready to brief your project?
Walk through our full 3D model process and bring us your brief a complete one gets you an accurate model on the first pass.
Start Your Brief







Leave a Reply