
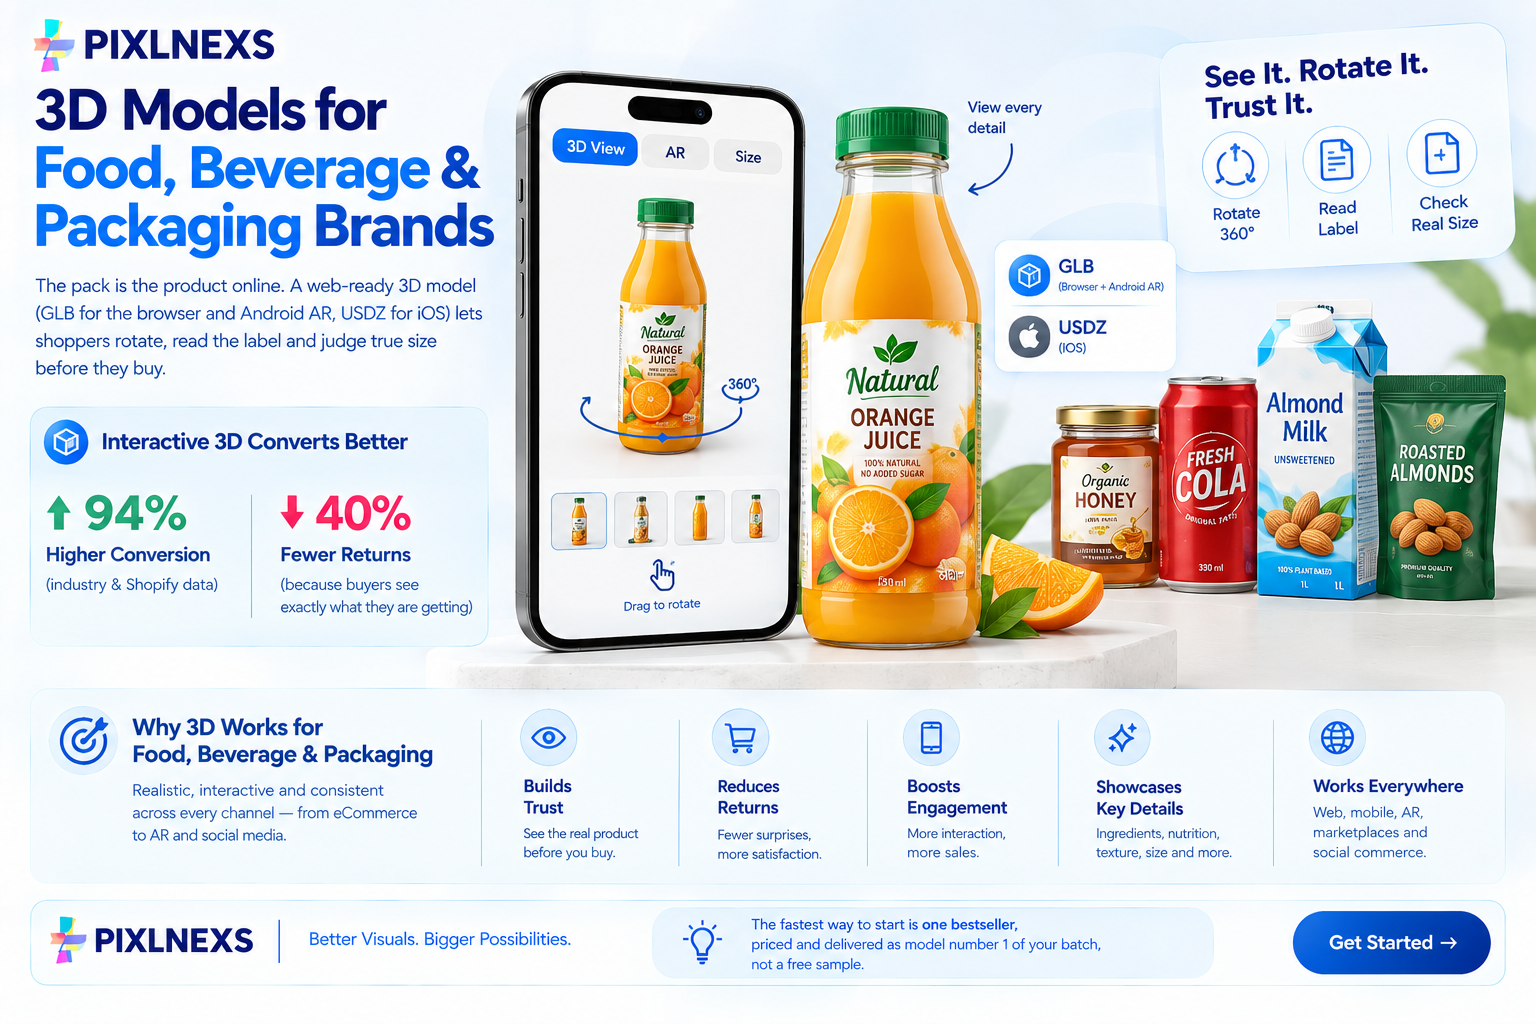
Quick Answer: 3D Models for food and beverage packaging brands, the pack is the product online so a web-ready 3D model (GLB for the browser and Android AR, USDZ for iOS) lets shoppers rotate a bottle, jar, can or carton, read the label at any angle and judge true size before they buy. Interactive 3D converts markedly better than flat photography industry and Shopify data put the lift at around 94% higher conversion and up to 40% fewer returns because buyers see exactly what they are getting. The fastest way to start is one bestseller, priced and delivered as model number 1 of your batch, not a free sample.
By Bali Balaji, Pixlnexs Studio. Pixlnexs builds web-optimized 3D and AR product visualization for food, beverage and packaging brands and this guide reflects the pipeline, deliverables and intake requirements our production team runs on every bottle, jar, can and carton we model.
Key Takeaways
- For food and beverage brands, the label is the product online a 3D model shows every panel, every contour and every detail of a pack, where a photograph only shows the one face a photographer chose to shoot.
- A GLB file built to a pack’s exact real-world dimensions is the single most effective way to address the two most common packaging return causes: “it was smaller than I expected” and “the color looked different online.”
- Interactive 3D for packaging converts significantly better than flat product photography industry benchmarks point to around 94% higher conversion rates and up to 40% fewer returns on product pages with a 3D viewer.
- One GLB file is the source for your web viewer, your AR placement, your rendered product images and your hero image all from one production run, not separate shoots and separate assets.
- Label UV mapping and material accuracy (glass, foil, matte card, translucent liquid) are the highest-skill steps in packaging 3D work and the ones that are most visible if done incorrectly.
- A flavor range or size range that shares a base pack shape can be delivered as one modeled shape with swapped label textures per variant, keeping costs down without sacrificing accuracy.
- Start with one bestseller. The before-and-after on your own highest-traffic product page is the only validation that matters for your specific brand and audience.
Why Food and Beverage Packaging Brands Need Interactive 3D
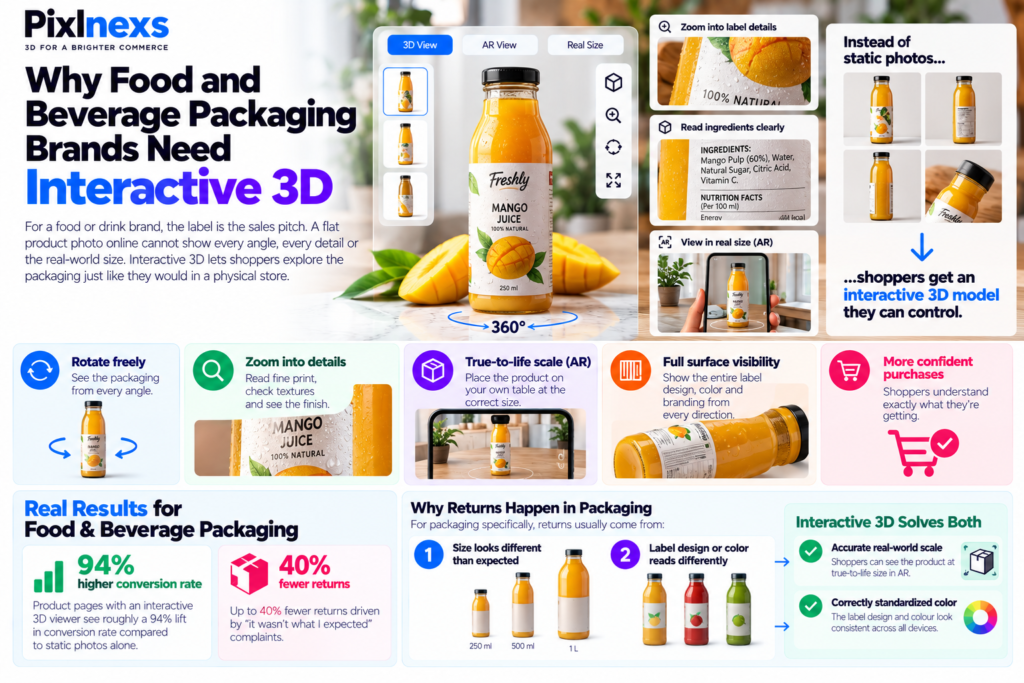
For a food or drink brand, the label is the sales pitch. A shopper standing in a store picks the bottle up, turns it, reads the ingredients, checks the volume against the products next to it and decides in seconds. A flat product photo online cannot do any of that. It shows one angle, at one size, with no sense of how the pack actually sits in a hand or on a counter.
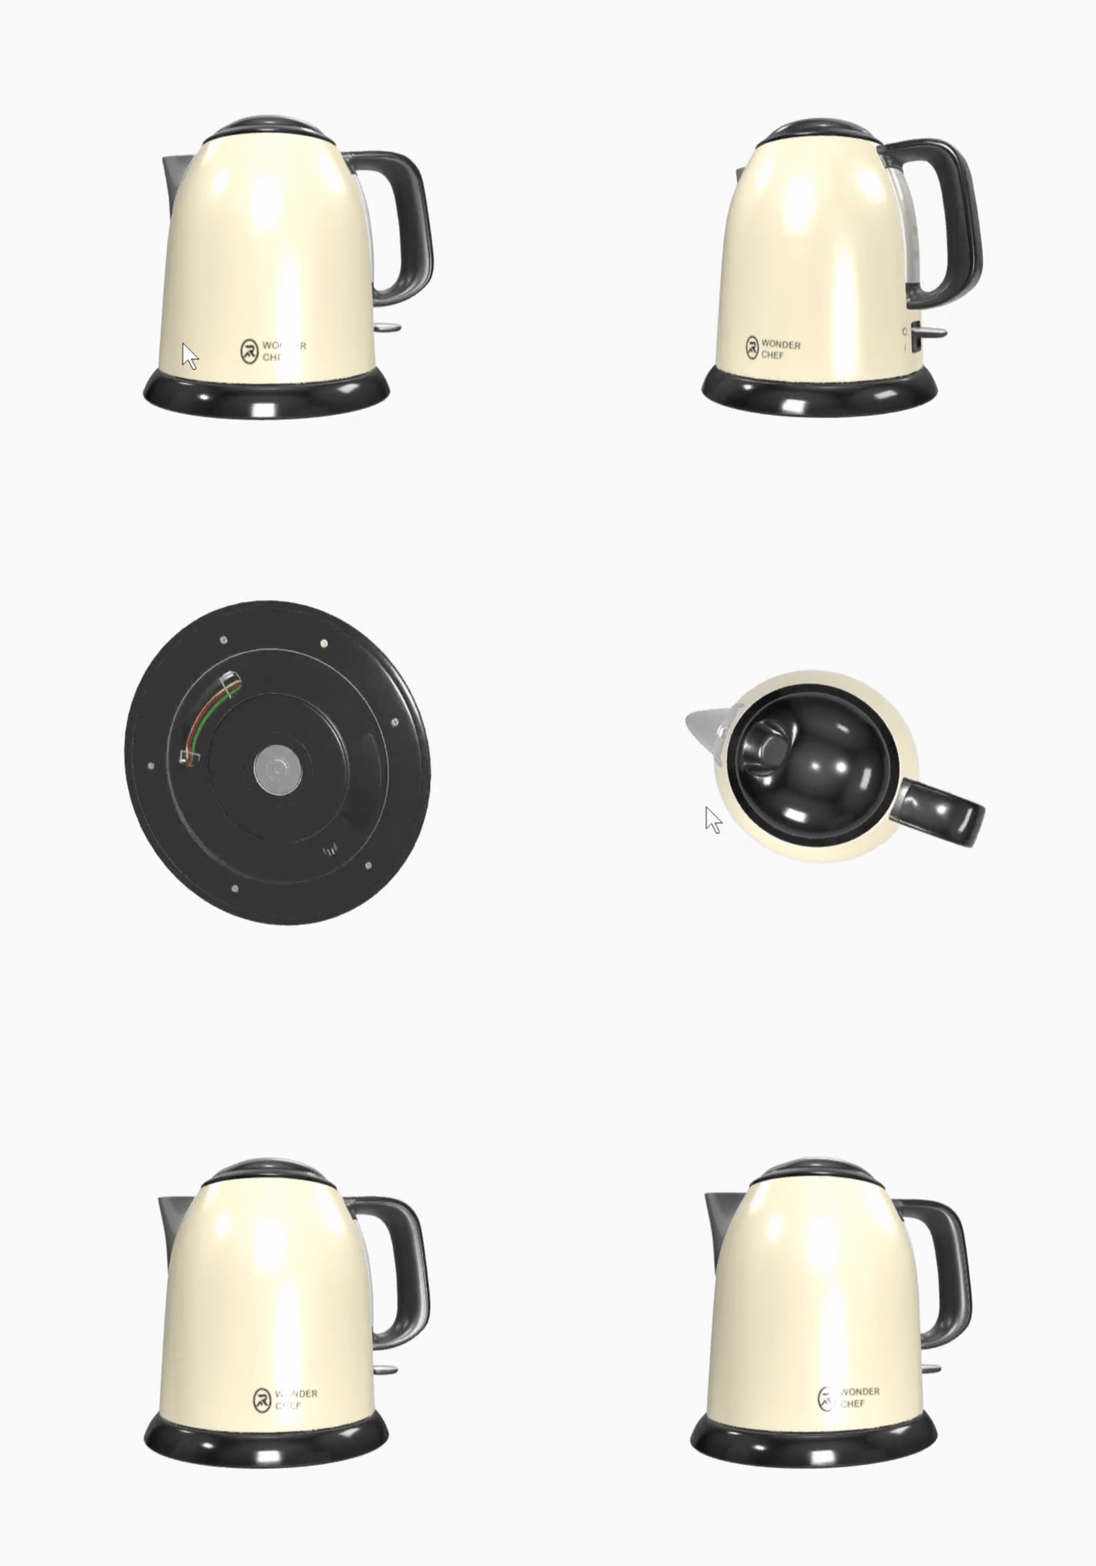
Interactive 3D closes that gap. Instead of four or five static shots staged in a studio, the shopper gets a model they control: they rotate it themselves, zoom into the label’s fine print and in supported AR viewers, place it at true-to-life scale on their own table. This is exactly why the whole 3D product visualization for food brands category pairs so well with packaged goods the product’s visual identity is entirely on its surface and 3D is the only format built to show a full surface from every direction.
The conversion data behind interactive 3D is not a marginal improvement. Shopify’s own merchant data and independent industry studies point to roughly a 94% lift in conversion rate for product pages with an interactive 3D viewer compared to static photos alone, alongside up to 40% fewer returns driven by “it wasn’t what I expected” complaints.
For packaging specifically, those returns usually trace back to one of two things: the size looked different than expected or the label design or color read differently on screen than it does in person. A 3D model with accurate real-world scale and correctly standardized color addresses both causes directly, which is why the ROI case for this category is cleaner and more measurable than almost any other product type.
What Interactive 3D Actually Shows a Buyer
Label, branding and pack shape clearly from all sides. Every panel of a label, every embossed detail on a cap, every contour of a bottle is visible not just the one face a photographer chose to shoot.
Real size and volume. A model built to exact dimensions tells the shopper, instantly and without reading a spec sheet, whether a bottle is a single-serve size or a family size. This is the most direct fix for the “it was smaller than I expected” return complaint.
Consistency across an entire SKU range. A flavor line or a seasonal range can share one base pack shape, with only the label and cap color swapped per SKU, so the whole range looks and behaves identically on the shelf and on screen.
One asset, reused everywhere. A single GLB file embeds on your own store, on Amazon and other marketplaces and in social posts and ads. You do not re-shoot the product for each channel you re-embed the same source file and render additional still images from the same model when needed.
How 3D Models for Food and Beverage Packaging Work
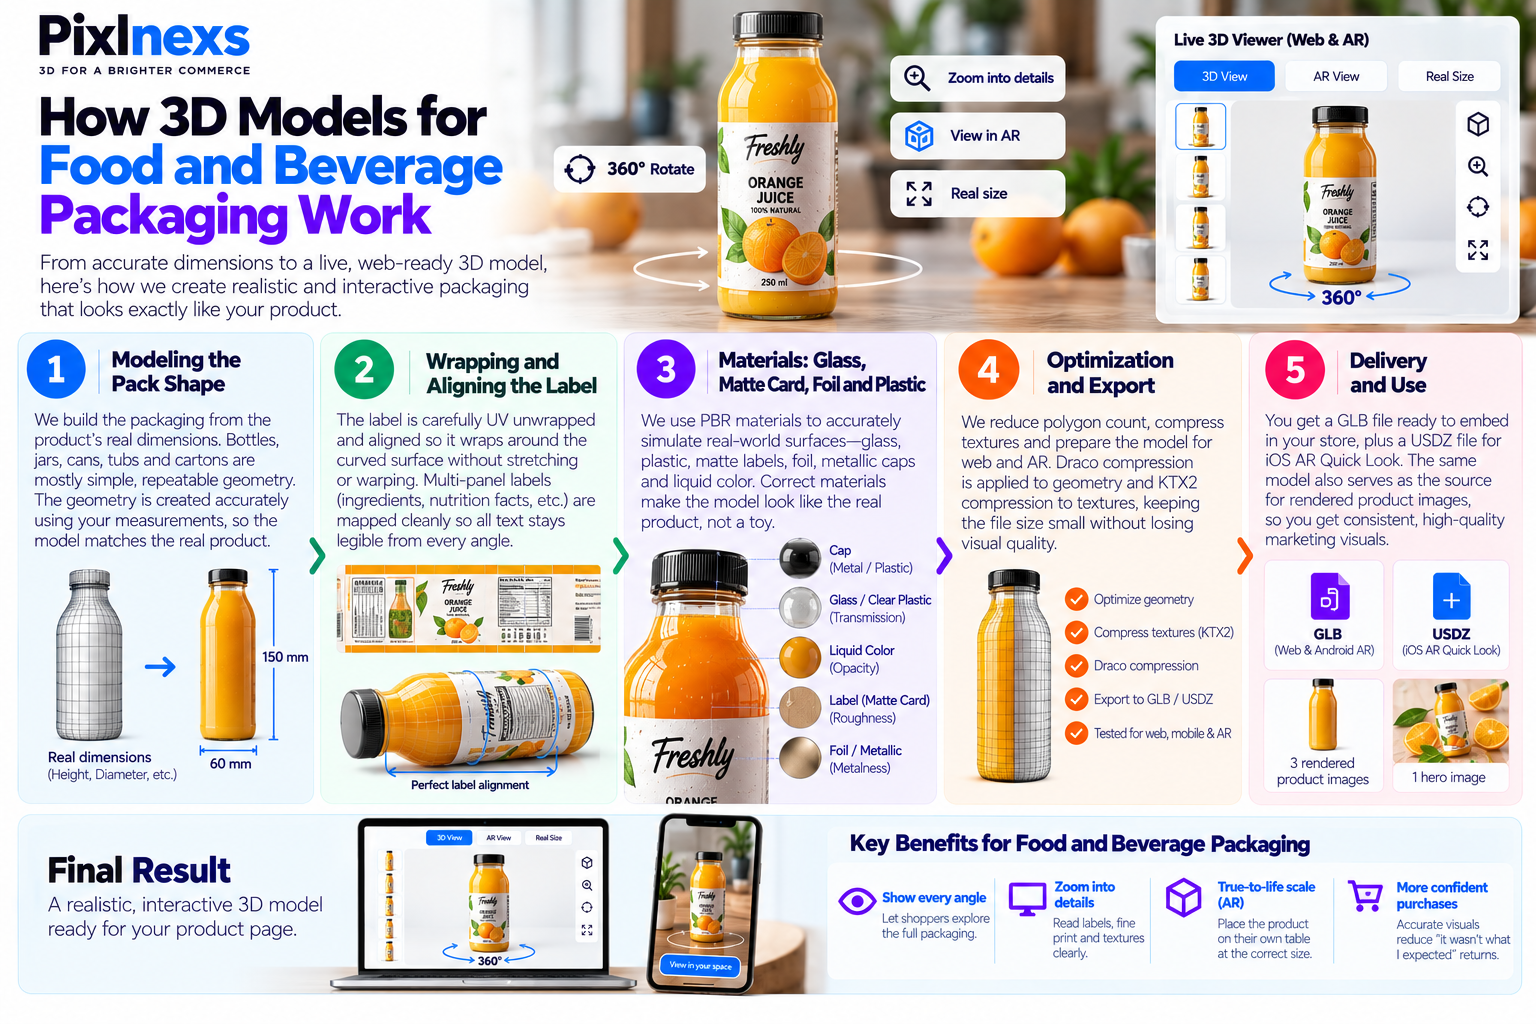
Packaging is, in some ways, the most forgiving category for 3D and, in other ways, the least. It is forgiving because most packaging is simple, repeatable geometry: bottles, jars, cans, cartons and pouches are mostly surfaces of revolution or straightforward extrusions. It is unforgiving because the label, the cap finish and the liquid or product color inside a clear container all have to be exactly right or the whole illusion of “this is my product, rendered accurately” falls apart.
Modeling the Pack Shape
Most packaging shapes bottles, jars, cans, tubs are built efficiently from the product’s real dimensions, because the geometry itself is rarely the hard part. A can is a cylinder with a seam and a rim profile. A bottle is a profile curve revolved around an axis, with a separate cap and closure. The modeling work is fast once accurate measurements exist, which is exactly why dimensions are one of the first things we ask for in the intake brief.
The more complex packs custom-shaped bottles with unusual shoulders or bases, irregular carton folds, composite closures take longer at this stage but are still well within the scope of standard packaging 3D work. Unlike fashion accessories or mechanical parts, packaging rarely presents geometry that is structurally ambiguous from reference photos alone, which makes the initial modeling pass comparatively straightforward when the brief is complete.
Wrapping and Aligning the Label
This is where packaging modeling diverges from most other product categories. A label is not a texture painted onto a surface at an angle it has to wrap correctly around curved geometry without stretching, warping or misaligning at the seam where the label wraps back on itself. Getting the UV mapping right is the single most time-consuming step in packaging 3D work and it is also the step that is most visible if done wrong. A warped logo or a seam that does not line up is immediately obvious to anyone who knows what the real product looks like, because almost everyone who has bought the product before already knows.
For multi-panel labels labels that wrap more than 180 degrees around a bottle or that have a distinct back panel with ingredients and a nutritional table the UV unwrap has to treat each panel cleanly so text remains legible at the angles a shopper is likely to inspect it from.
Materials: Glass, Matte Card, Foil and Plastic
Packaging materials behave very differently under light and a PBR (Physically Based Rendering) material setup is what makes each one read correctly. Getting materials right is the difference between a model that looks like the real product and one that looks like a rendering of a toy version of it.
Glass and clear plastic need accurate transmission and refraction so the product looks genuinely transparent, not frosted or opaque. A clear spirits bottle or a glass jar of sauce that renders as a solid matte object has failed at its primary job.
Matte cardboard and paper labels need the correct roughness value so they do not pick up unrealistic specular highlights. Cardboard that shines like plastic is one of the most common and most jarring material errors in packaging 3D.
Foil, metallic caps and embossed logos need a proper metalness map and correct specular response or they render flat and lifeless instead of catching light the way real foil does. Embossed details on a cap or a label need normal mapping to create the appearance of depth without requiring the geometry cost of modeling every raised character individually.
Liquid color inside a clear or translucent container is modeled as its own internal volume with the correct color and opacity, so a clear bottle of juice or spirits shows the right hue through the glass, not just an empty container or a solid colored fill.
Web Optimization and Export
Once the model and materials are finalized, the asset goes through the same optimization pass every web-ready 3D product needs: polygon count reduced to what the geometry actually requires, textures compressed and the final file exported to GLB for the web and Android AR, with a USDZ companion file for iOS AR Quick Look. For packaging, where catalogs often run into dozens or hundreds of SKUs across flavors and sizes, efficient export is even more important than usual a 15 MB model per SKU across a 50-SKU range creates cumulative page weight problems that one well-optimized model does not.
Draco compression is applied to geometry and KTX2 texture compression is applied to material maps as standard on every packaging model we deliver.
What You Get
Every model ships as a complete, ready-to-use package. The deliverable is not a raw 3D file for your team to process it is a finished, tested, platform-ready asset set.
One web-ready GLB file per product, optimized for your storefront’s 3D viewer and for Android AR via Scene Viewer.
3 high-quality rendered product images generated directly from the same 3D source, so your product photos and your interactive viewer always match exactly. These are not separate photography they are renders from the model, which means they are consistent with every angle a shopper can reach in the viewer.
1 enhanced hero image a polished, campaign-ready render for your main product page or ad creative.
A USDZ companion file for iOS AR Quick Look, so the same model works across both major mobile platforms without a separate asset build.
Turnaround is typically about 4 working days per product. Because the same GLB file is the source for the viewer, the renders and any future marketing use, you are not paying for a photoshoot, a separate 3D project and a separate render job. One production run produces all of these outputs.
| Deliverable | Format / Spec | Where It Is Used |
|---|---|---|
| Web-ready 3D model | GLB (glTF 2.0), optimized for web and Android AR | Product page viewer, AR placement, marketplace embeds |
| iOS AR companion file | USDZ | iOS AR Quick Look on iPhone and iPad |
| Rendered product images | 3 high-quality stills generated from the 3D model | Gallery images, marketplace listings, social |
| Hero image | 1 enhanced, campaign-ready render | Main product page, ads, social creative |
| Turnaround | Approximately 4 working days per product | Per-SKU delivery schedule |
What We Need From You
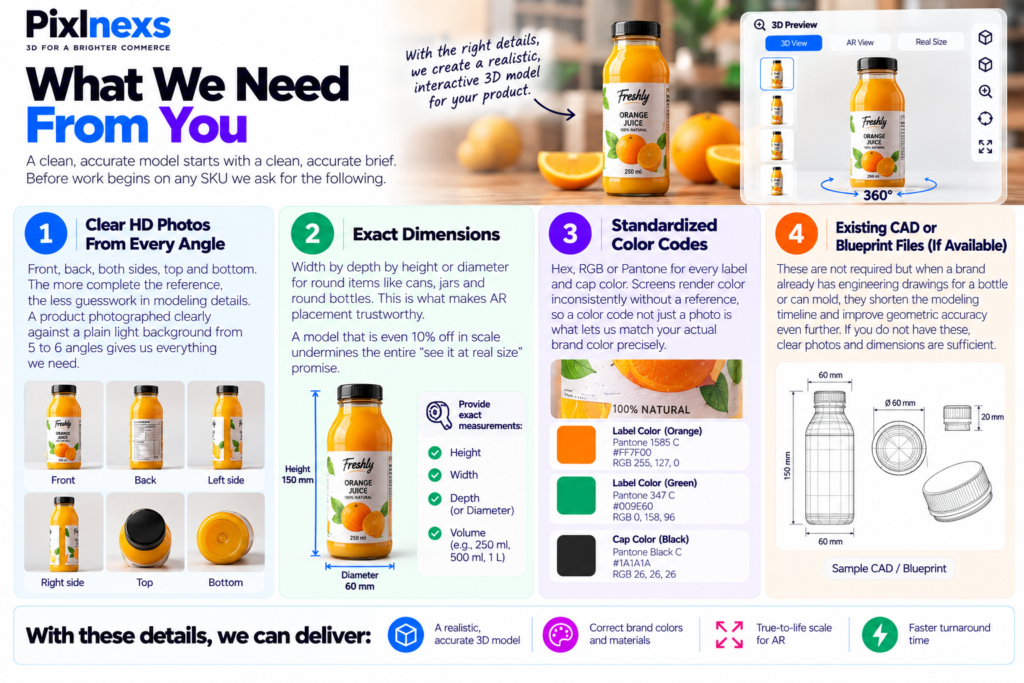
A clean, accurate model starts with a clean, accurate brief. Before work begins on any SKU we ask for the following.
Clear HD Photos From Every Angle
Front, back, both sides, top and bottom. The more complete the reference, the less guesswork in modeling details a single photo would not show. A product photographed clearly against a plain light background from 5 to 6 angles gives us everything we need. A single hero shot from one angle does not.
Exact Dimensions
Width by depth by height or diameter for round items like cans, jars and round bottles. This is what makes AR placement trustworthy a model that is even 10% off in scale undermines the entire “see it at real size” promise. If a shopper places a 250ml bottle in AR and it looks the same size as your 1 liter version, you have created a worse product experience than no AR at all.
Standardized Color Codes
Hex, RGB or Pantone for every label and cap color. Screens render color inconsistently without a reference, so a color code not just a photo is what lets us match your actual brand color precisely. This matters most for brand-specific reds oranges and certain blues, where the difference between what a screen renders from a photograph and the true brand color is large enough for shoppers to notice.
Existing CAD or Blueprint Files (If Available)
These are not required but when a brand already has engineering drawings for a bottle or can mold, they shorten the modeling timeline and improve geometric accuracy even further. If you do not have these, clear photos and dimensions are sufficient.
Start With One Product
The lowest-risk way to begin a 3D rollout is not to commit your entire catalog upfront. It is to start with a single bestseller, see the exact model quality on your own product page and only then decide how much of the rest of the catalog to convert.
We do not offer free samples. The first model you commission is a paid deliverable, priced and produced exactly like every model after it it is simply model number 1 of your batch, not a trial. That keeps the first result representative of what you will actually get at scale, rather than a specially polished demo that does not match ongoing production quality.
Why Starting Small Works
You validate quality and turnaround on real production work, not a sales demo. You get a direct before-and-after comparison on your own highest-traffic product page. You can measure the actual conversion and return-rate impact on your own traffic before committing budget to the full range. Scaling to the rest of the catalog then becomes a straightforward repeat of a proven process, not a leap of faith.
For brands with a large SKU count across flavors, sizes and seasonal lines, a one-SKU pilot also lets you establish the brief format, the file naming convention, the variant delivery structure and the integration process for your specific store setup all of which make the rest of the rollout run faster and with fewer rounds of back-and-forth.
Common Pitfalls in Food, Beverage and Packaging 3D
Label Misalignment
A label that wraps a bottle slightly crooked or has a visible seam mismatch is immediately noticeable, because customers already know exactly what the real label looks like. This is the most common quality failure in low-cost packaging 3D work and the one that does the most damage to trust, since anyone who has bought the product before will spot it instantly.
Flat-Looking Liquid
Treating the contents of a clear bottle as part of the glass material, rather than as its own colored volume with accurate transmission properties, makes drinks look washed out, colorless or indistinguishable from an empty container. For beverage brands where the color of the liquid is part of the product’s identity amber spirits, green matcha drinks, cloudy juices this is a material failure that makes the product less recognizable, not more.
Inaccurate Scale
Packaging sold at multiple sizes (a 250ml and a 1 liter version of the same product) needs each size modeled to its own real dimensions. Reusing one model at different display scales undermines the entire point of AR placement. A shopper who places a “250ml” model in AR and sees something the size of a bucket has received inaccurate information and has less reason to trust the product page, not more.
Color Drift
Without a supplied Hex, RGB or Pantone reference, a label color rendered from photos alone can shift noticeably from the brand’s actual packaging color. This is especially pronounced in reds oranges and certain brand-specific shades that photograph slightly differently under different lighting conditions. A color code eliminates this ambiguity entirely.
Overweight Files Across a Large SKU Range
A flavor line with 20 variants needs each model built efficiently from a shared base,or the cumulative page weight across a catalog page slows load times across the board. The fix is batching: one base model, 20 label swaps, each exported at the same optimized file size target. The problem is typically caused by treating each flavor as a completely independent model build rather than a variant of a shared source.
How AR Placement Works for Packaging
AR placement anchors the 3D model at its real-world dimensions in the camera feed. A 750ml wine bottle modeled at its actual height and diameter appears at that size when placed on a real dining table, which lets a shopper hold their phone up and see exactly how the bottle looks in context. This is the only format that answers the “how big is this actually?” question without the shopper having to read a dimensions chart and convert it into a mental image.
For iOS, AR Quick Look launches automatically when a shopper taps a product with a USDZ model in Safari on iPhone or iPad. For Android, Scene Viewer launches from Chrome. Neither system requires an app download the experience is built into the operating system and triggered from the product page. For the full technical comparison between these two systems and when to use each, see our guide on native app AR vs WebAR for ecommerce.
The single most important requirement for AR to be accurate rather than misleading is that the model was built to the product’s actual dimensions. A model built at approximate or assumed dimensions will look wrong in AR immediately particularly for packaging, where shoppers have strong existing expectations of how familiar bottle and can sizes look in the real world.
SEO and Page Performance Considerations
Adding an interactive 3D viewer to a product page affects page performance and this deserves an honest discussion rather than the “3D is always good for SEO” framing some vendors use.
An unoptimized 3D model can hurt Largest Contentful Paint (LCP) and Core Web Vitals scores if the viewer initializes eagerly and blocks page rendering. A correctly implemented viewer loads lazily it initializes only after the main page content has rendered and only when a shopper scrolls to or interacts with the product section. This means a shopper who bounces immediately sees no performance cost and a shopper who stays and engages triggers the viewer load at the point where they have already shown buying intent.
For food and beverage brands with large catalogs, this matters at scale. A product listing page with 50 SKUs each loading a 3D viewer eagerly is a performance disaster. The same page with 50 lazily-loaded viewers is fine. We provide lazy loading guidance alongside every GLB delivery and for the most common viewer integrations including Google model-viewer, Shopify’s native 3D support and the most widely used WooCommerce viewer plugins the implementation is well documented.
When done correctly, interactive 3D tends to improve the engagement signals that search engines observe as quality indicators: time on product page increases, bounce rate from product pages often decreases and return rates fall, which reduces negative purchase signals across the catalog.
Comparison: 3D Models vs. Traditional Product Photography for Packaging
Traditional packaging photography will always serve a purpose in brand building lifestyle imagery, in-use shots and editorial photography communicate emotional and aspirational signals that a 3D viewer does not. But for the product inspection use case “what does this product actually look like and how big is it?” the comparison between photography and interactive 3D is not straightforwardly in photography’s favor.
A photo shoot for a 10-SKU flavor range produces a fixed set of angles for each SKU, typically shot in a session. If a new flavor launches, a new shoot is needed. If the label is updated mid-season, the existing shots are wrong. A 3D model, once built, produces unlimited angles and renders, can be updated with a new label texture for a fraction of the cost of a new shoot and the AR placement works from the same file with no additional production.
For food and beverage brands with high SKU counts, frequent label updates for seasonal or promotional variants and products sold across multiple pack sizes, the cumulative cost comparison tends to favor 3D at scale. The per-unit cost of adding a new flavor to an existing 3D range reusing the base model with a new label texture is significantly lower than commissioning new photography, particularly when the cost of retouching, licensing and channel-specific adaptations is included in the photography budget.
For the full comparison of 3D product visualization against traditional photography across quality, cost and reusability, see our detailed guide on 3D product visualization vs product photography.
Scaling From One SKU to a Full Catalog
Once the pilot model has been delivered, validated and measured on your own product page, scaling to a full range follows a predictable process rather than a variable one.
Shared Base Models for Flavor and Size Lines
If your range uses the same pack shape across flavors the same bottle shape with a different label per flavor or the same can diameter across a range of drinks the base geometry is modeled once and reused across all variants with swapped label texture maps. This reduces per-variant cost significantly compared to building each SKU as an independent model.
Different sizes within a range still need their own model built to that size’s actual dimensions, since AR placement depends on the correct scale for each. A 330ml can and a 500ml can are different models they are not the same model scaled up but if the shape is the same between them, the modeling work for the second size is faster because the proportions and the label mapping approach are already established.
Delivery Cadence for Large Catalogs
For brands with 20 or more SKUs to convert, we work to an agreed delivery cadence rather than delivering everything simultaneously. This typically means batches of 5 to 10 SKUs per week, with each batch signed off before the next begins. This approach lets a brand’s development team integrate new GLB files into the store progressively, test each one at launch and catch any integration issues early in the rollout rather than discovering them after a full 50-SKU push.
Quality Consistency Across a Large Range
One of the least-discussed risks in catalog-scale 3D rollouts is quality drift: the first few models are scrutinized closely and look excellent but models 30 through 50 of a large range are checked less carefully and subtle inconsistencies accumulate slightly different lighting assumptions, a label seam that is 2mm off on one variant but not others, a cap color that drifts between batches. We address this by establishing a reference standard on the first approved SKU and checking all subsequent variants against it before delivery, not just against the brief.
Conclusion
For food, beverage and packaging brands, the move from static photography to interactive 3D product visualization is not a cosmetic upgrade it is a direct response to the two most common reasons shoppers do not convert and the two most common reasons they return. A shopper who can rotate a bottle, read every panel of a label, inspect the cap finish and place the product at true-to-life scale in their own kitchen is a shopper who arrives at checkout without the uncertainty that causes abandoned carts and post-delivery disappointments.
Pixlnexs builds these models to production standard for brands at any scale, from a single bestseller to a full catalog rollout. Every model ships as a web-ready GLB, a USDZ companion, 3 rendered images and a hero image all from one production run, typically in about 4 working days per product.
Frequently Asked Questions
Does interactive 3D actually reduce returns for food and beverage products?
Yes, when the model is built to accurate real-world dimensions and correct label color. Most returns in this category stem from size or color mismatches between the customer’s expectation and the real product and both are exactly what an accurate 3D model and AR placement are designed to resolve. The scale of the improvement will vary by catalog, so treat the 40% figure as a directional benchmark to validate against your own before-and-after data.
What file format will I receive for my product models?
A web-ready GLB (the binary packaging of glTF 2.0) for your storefront’s 3D viewer and for Android AR via Scene Viewer, plus a USDZ file so the same model works in iOS AR Quick Look. For a full comparison of these formats, see our guide on GLB vs USDZ vs OBJ: 3D file formats explained.
Can you model a product inside clear glass or plastic packaging?
Yes. Clear and translucent containers are modeled with accurate transmission and refraction for the container itself and the liquid or product inside is modeled as its own colored volume, so the final render shows the correct hue and clarity through the packaging, just as it looks in person.
Do you need CAD files to build an accurate model?
No. CAD or blueprint files help and can shorten the timeline when available but most packaging models are built successfully from clear reference photos and exact measurements alone.
How long does it take to model an entire product range?
Each individual product takes roughly 4 working days once we have the photos, dimensions and color codes for it. A full range’s timeline scales with SKU count, though shared base shapes across a flavor or size line can speed up later SKUs in the same range.
Can one base model cover multiple flavors in the same product line?
Partially. If the pack shape is identical across flavors and only the label artwork changes, the base geometry can be reused efficiently with swapped label textures. Different sizes within a range still need their own model built to that size’s actual dimensions, since AR placement depends on correct scale for each.
What happens if I only want to convert my bestsellers, not my whole catalog?
That is the recommended approach. Start with one bestseller as model number 1, evaluate it on your live product page and scale up to additional SKUs at your own pace once you have seen the real-world impact on conversion and returns.
Can the rendered images replace our existing product photography?
For product-inspection purposes gallery images, marketplace listings, product page thumbnails yes, the rendered images are production quality and are generated from the same source as the interactive viewer, so they are perfectly consistent with every angle available in the viewer. For lifestyle or in-use imagery, traditional photography is still appropriate since that style of image is produced in context, not rendered from a model.
Ready to Get Started
See Your Product in 3D Starting at One SKU
Send us one product photo and we’ll get you an exact quote. No free samples your first model is produced exactly like every model after it, so what you see is what you scale.
Get a Quote for Interactive 3D






Leave a Reply